Boat Battery Connection Diagram and Wiring
Here in this article, we are going to see the connection diagram and wiring of batteries in a boat. In this wiring diagram, we will see how many types of batteries are and how they are connected to the boat's electrical system.
Generally, there are two types of batteries that are mainly used in a boat - Starting battery and House Battery.
Starting Batteries: Starting batteries are designed to deliver high bursts of power for a short duration to start the boat's engine(s). They have a high cranking amp (CA) and cold cranking amp (CCA) rating. The cold cranking amp (CCA) rating makes them capable of providing the necessary starting current even in cold weather conditions. These batteries are typically used to start the main engine(s) and are then recharged during the boat's operation.
House Batteries: They are also known as Deep cycle batteries. They are designed to provide a steady and sustained amount of power over an extended period. They are used to power various electrical systems and devices on the boat, such as lights, radios, electronics, trolling motors, and other accessories. Unlike starting batteries, deep cycle batteries are better suited for repeated discharging and recharging cycles without losing their capacity.
Wiring Diagram
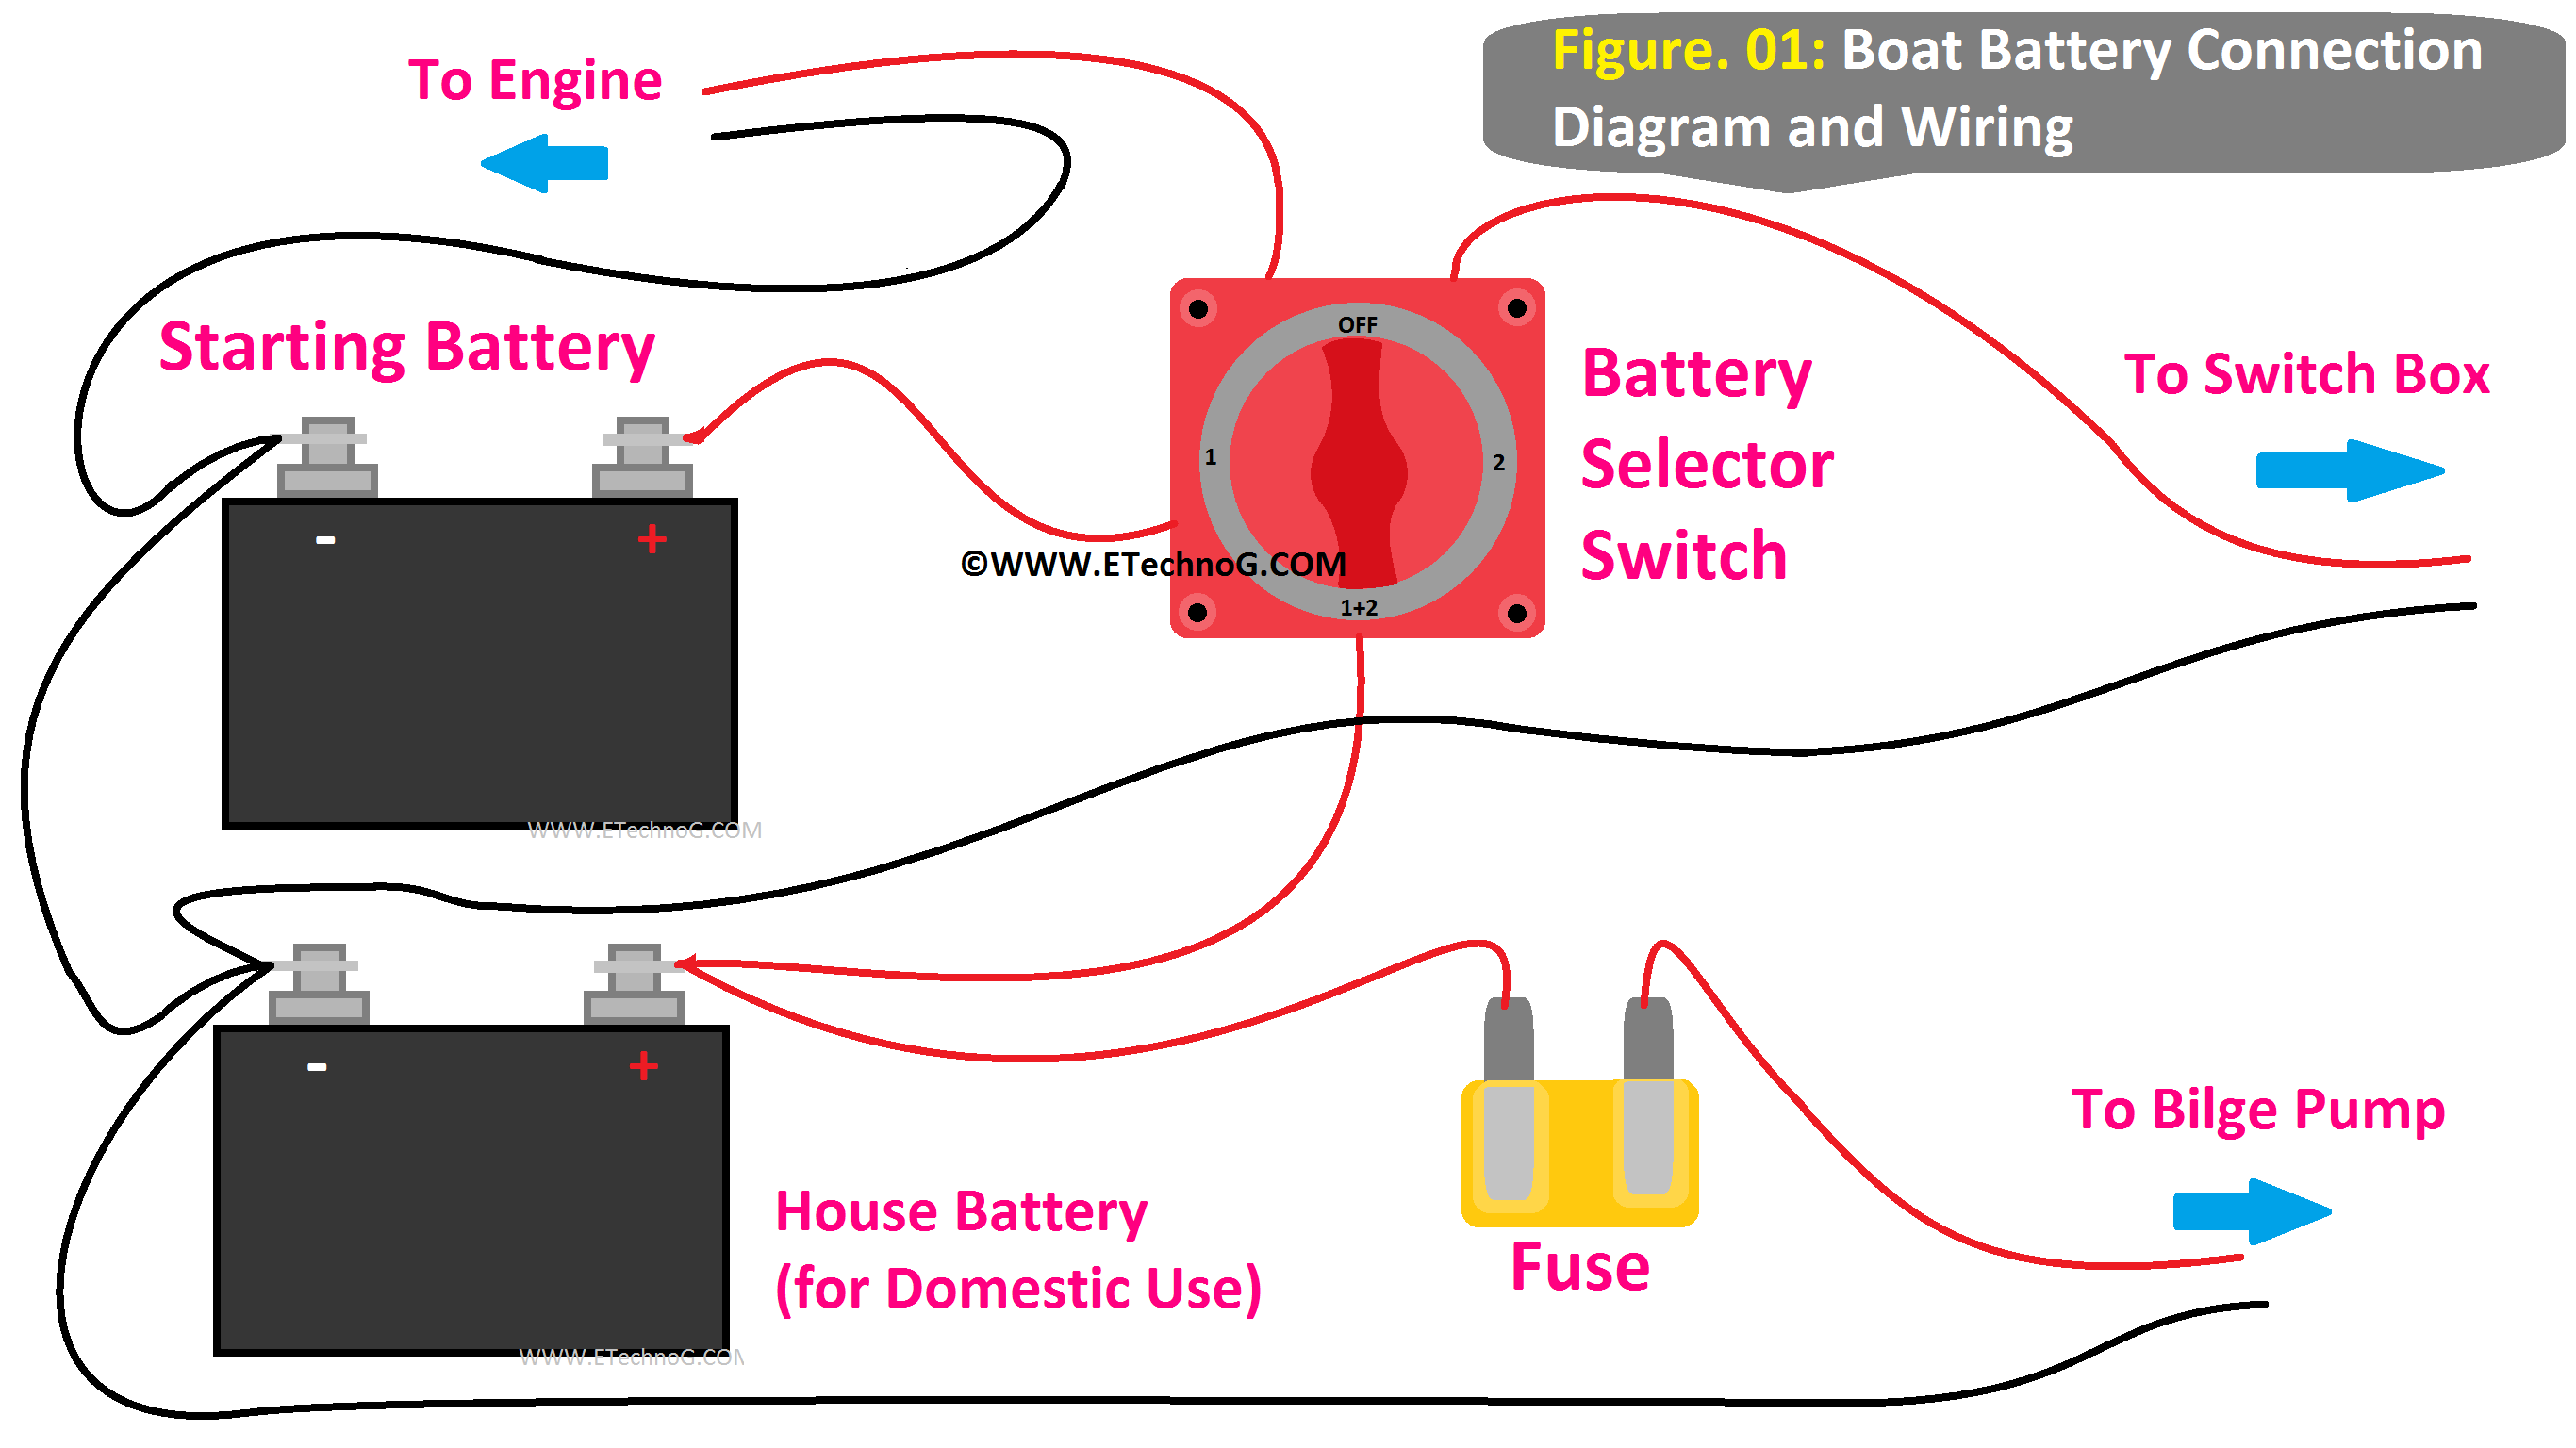
Here, you can see the connection of both the Starting Battery and the Deep cycle battery. Here single battery is shown for each type but the boat may have multiple batteries connected in series or parallel combinations for each type according to the power requirement of the system and design.
In the above wiring diagram, you can see all the batteries are connected to a selector switch. This is because to control all the battery power from one place, we use a battery selector switch. This switch has three positions that do different things.
"OFF": When the switch is in the "OFF" position, all the batteries are disconnected from the system. No power flows in or out of the batteries.
"1" or "Battery 1": This position connects the boat's electrical system to the first battery. In this condition, the power flows from this battery to the devices and systems on board. We use this position when we want to mainly use the first battery.
"2" or "Battery 2": Similarly, this position connects the boat's electrical system to the second battery. In this condition, the power flows from the second battery to the devices and systems on the boat. We use this when we want to mainly use the second battery, like keeping the starting battery separate from the house battery.
"1+2" or "Both" or "All": In this position, the switch combines both batteries together. In this condition, the power flows from both batteries at the same time, giving us more power and backup. We use this position when we need a maximum power supply, like starting the engine or using high-demand electrical systems.
Connection Description
1. The positive terminal from both types of batteries is connected to the selector switch input terminals. For example, if the Starting battery is connected to Input 1, the house battery will be connected to Input 2.
2. The negative terminal from all the batteries is connected together to make a common negative terminal. And this negative terminal is to be connected to the negative terminals of all the loads directly.
3. The output from the selector switch is distributed to different loads(e,g, engine), breaker panels, etc.
Remember that the bilge pump is generally connected to the house battery directly bypassing the selector switch through a float switch. If there is a manual switch connected then it may take power through the breaker panel.
Read Also:

